
This post contains affiliate links. We may earn compensation when you click on the links at no additional cost to you.
Here’s what I love about Fall. As the name suggests, nature floats free gifts to the ground, for the taking. Go on a nature walk, within only a few steps I guarantee a small token from nature will speak to you. It will say, “pick me up, take me home and create!” I tend to listen to nature when handouts are involved.
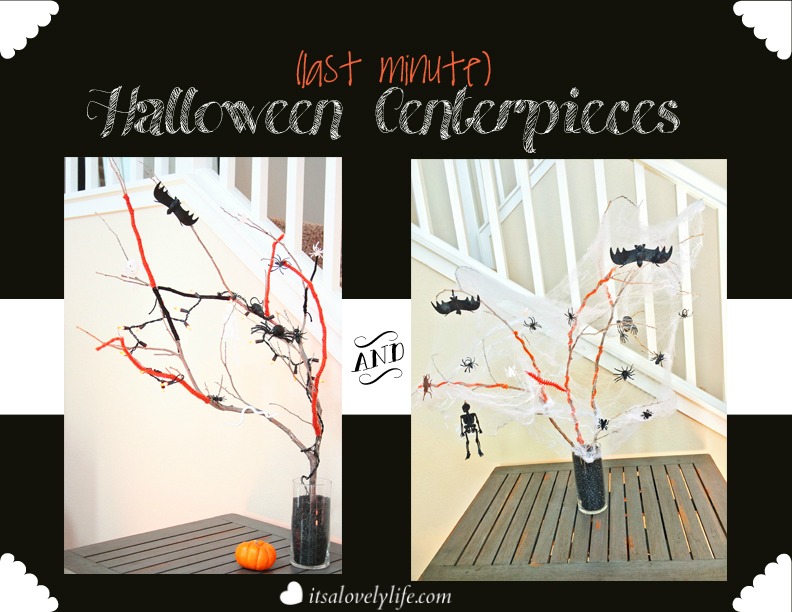
A few weeks ago our family went on the most amazing three day excursion to the Sequoias. (If you read my “Pumpkin Bun” post, you may have noticed the organic setting in which we shot the pictures in.) Something about nature allows such freedom of creative expression, it’s almost impossible to ignore. While on this getaway amongst the trees, we came across branches and twigs just lying there, in the sweetest whisper asking for creative reincarnation, if you will. We picked the branches and twigs from the ground, and were on our way to a project even the kids would enjoy. Halloween centerpieces! In no way are these difficult, and in no way will they break the bank. These can be used in your own last minute holiday decoration, given as gifts or even taken into a classroom as a class project!
We used larger pieces as our base, you may use smaller and make a few to put around the house or in each of your children’s rooms. We also made two different flavors of the centerpiece. One to reflect each of my children’s creative abilities. It’s all up to you…that’s what I love about organic art, there is never a wrong way to create!
Shall We..
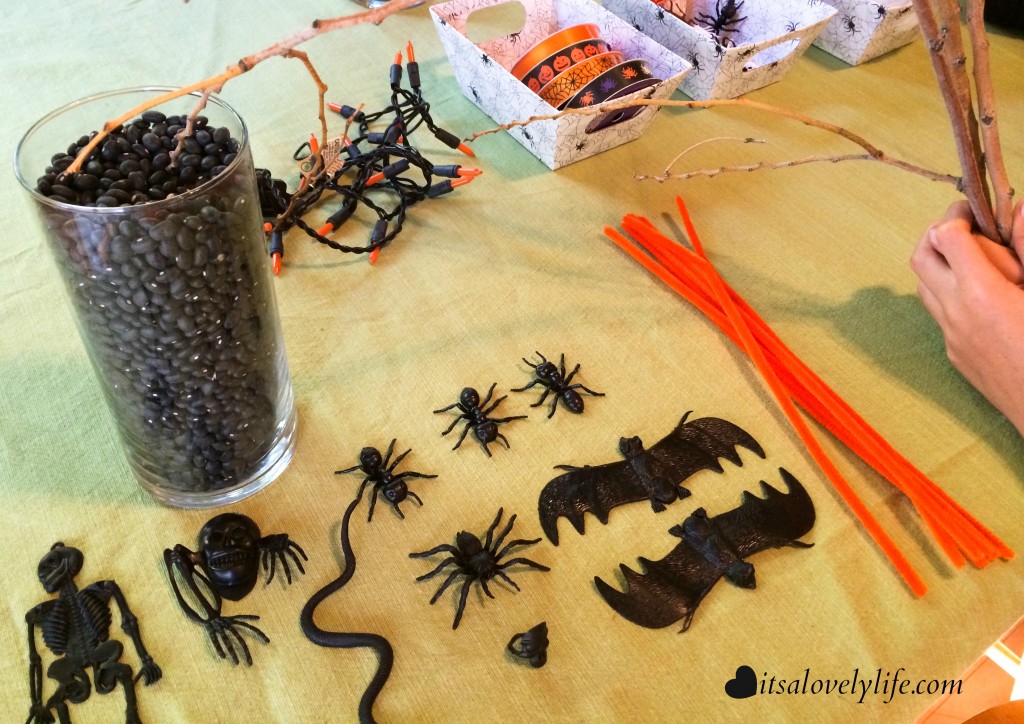
 Gather:
– Sticks/Twigs from Nature
– Glass Vase(s) or Mason Jar
– Yarn or Pipe Cleaners (in festive colors)
– Small Rocks or Dried Black Beans
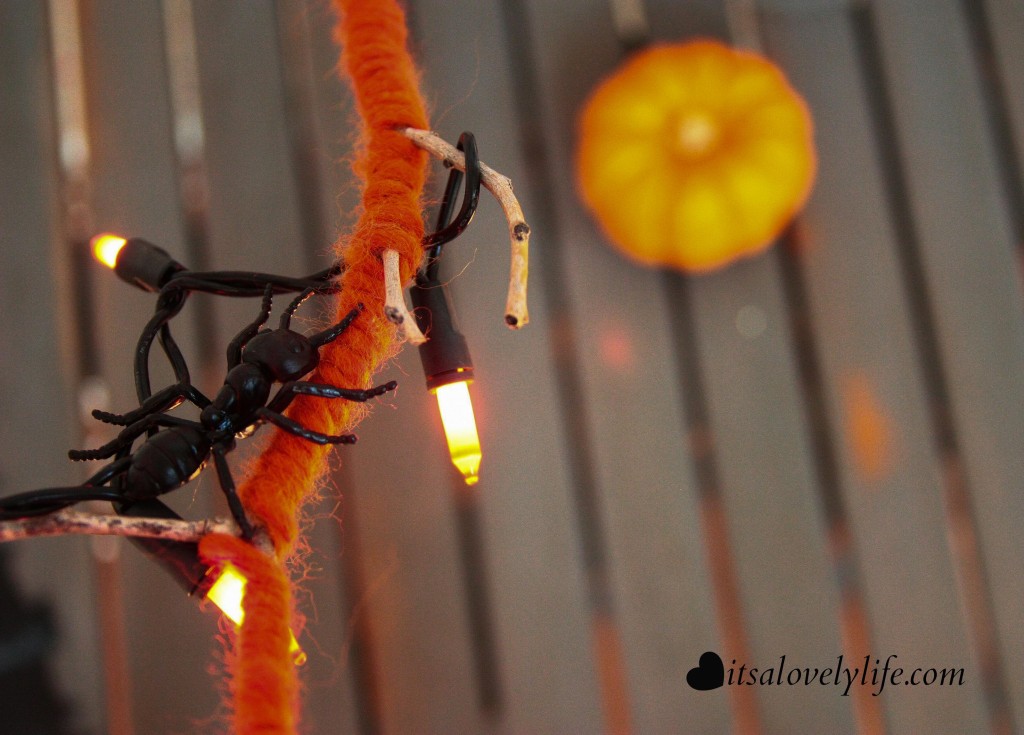
– Lights or Strobe Light
– Spider Webbing
– Plastic Creepy Crawlers
– Ribbon (optional, pictured – but we didn’t end up using any)
**Note: All items above where purchased at the dollar store, except for the branches**
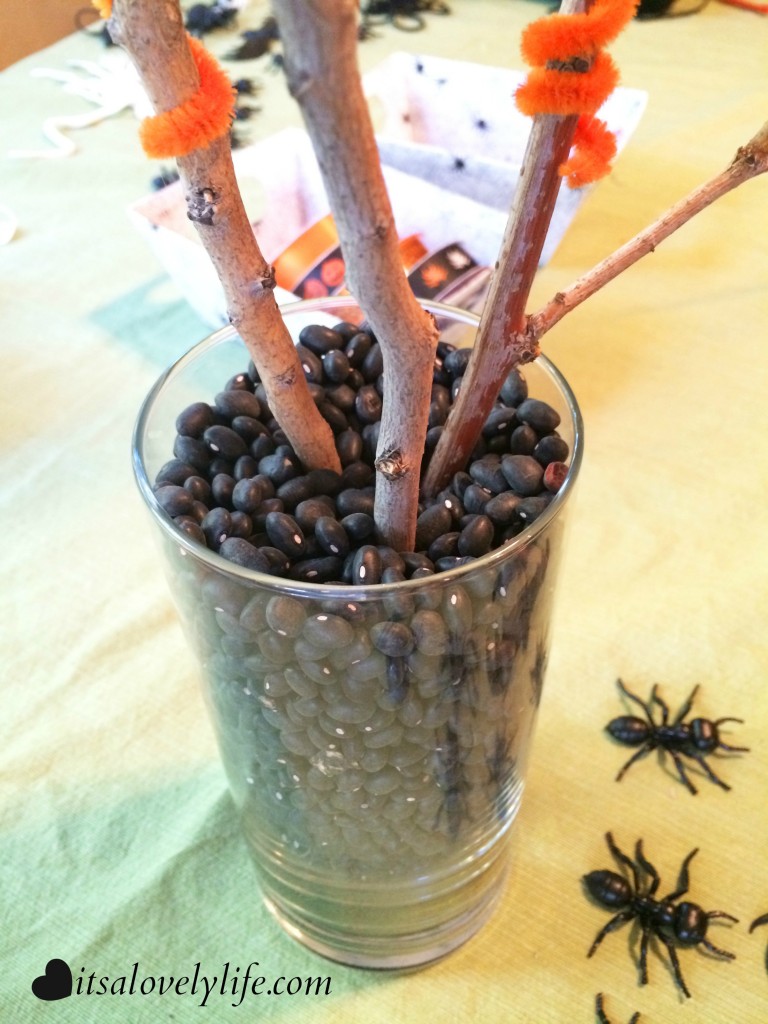
Building the Base
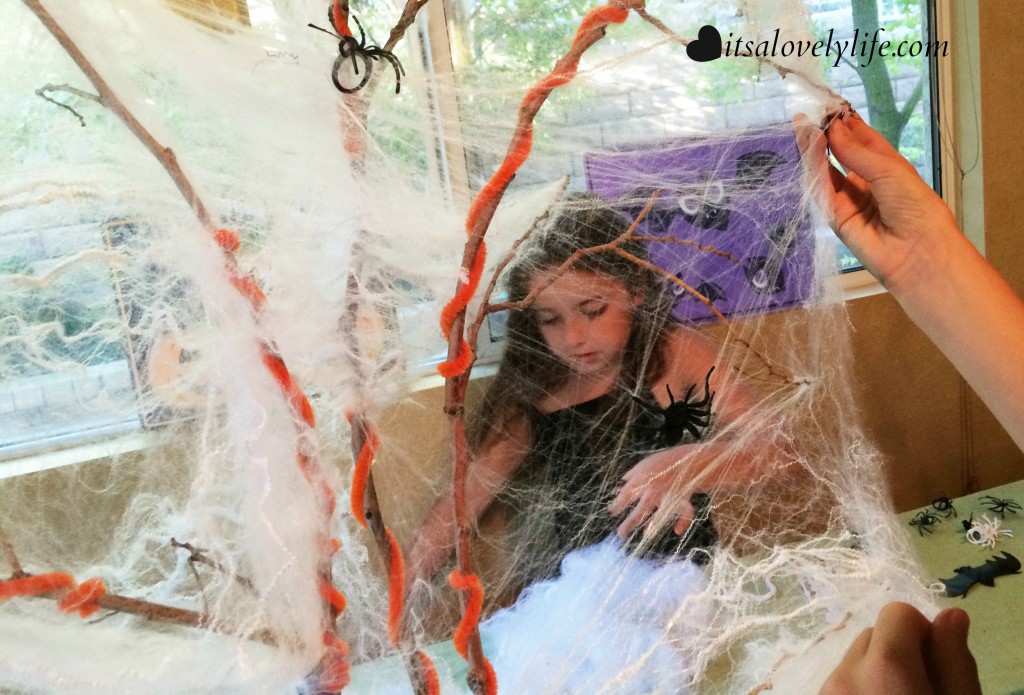
Grab your vase and fill it with either the rocks or black beans. Lay out your critters and other items you’ll add to your centerpiece. Next, take your sticks/twigs and stick them all the way down until they touch the bottom of the vase.
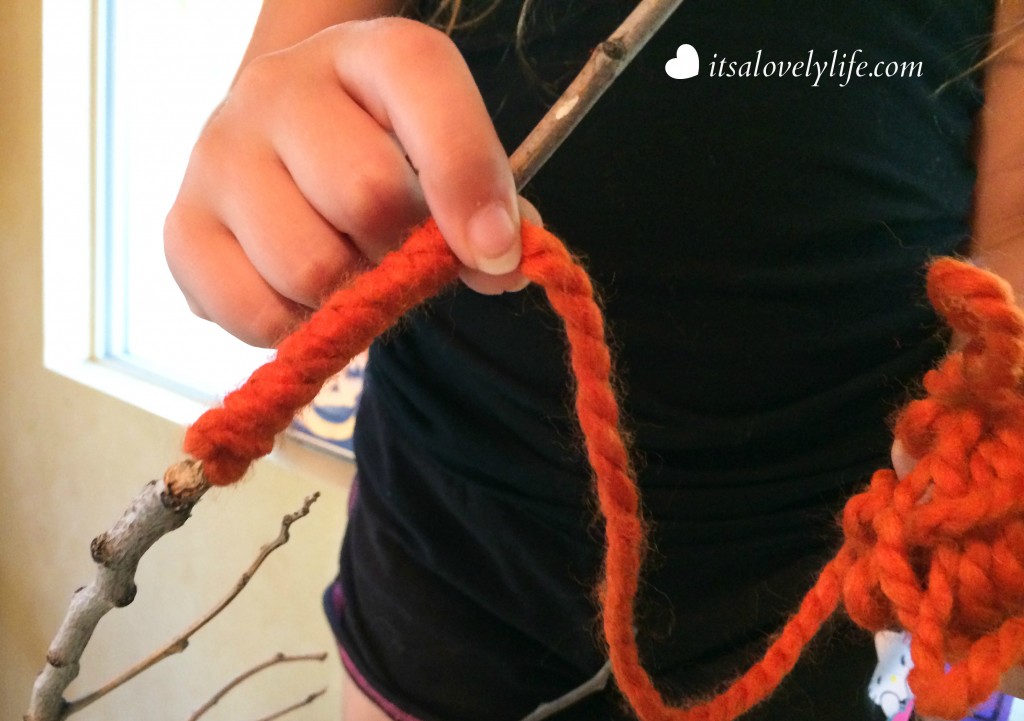
All Wrapped Up
If you are using pipe cleaners, simply begin to wrap them around various parts of the branches. You may alternate colors, you may keep the wrapping tight or loose, as pictured. If you are using yarn, see the example below of how to wrap it first around your hand into a little ball. Cut off as much as you think you’ll need to cover the branch. Begin wrapping the yarn, as seen in photo.

Adding Character
Now for the fun part! If you are using lights, add those to the branches first. Then, add your webbing, if you are using webbing. I opted to use webbing for one and not the other, just to have two different looks, and again per my children’s request! The strobe light was a fun addition, we just put it in the middle of the base of the sticks. Then those creepy crawlers who have been patiently waiting (or waging a war against humankind, per the image below :/. Since we all know everything gets stuck in webs, they will easily attach to the webbing. If no webbing, no worries! Nature gives you neat little places to put these critters and if your keeping the centerpiece in one place, they’ll stay just fine.

Here are a few additional views:
That’s it! Quick, Easy and now you have a custom decoration!
Do you decorate for Halloween?


That becomes pretty creapy.. lol But its a great DIY for the holiday!
That is so clever! I would never have thought to use beans as a base for the twigs. Thanks for sharing this great centerpiece.
What a great centerpiece. I love that you used things your purchased at a dollar store.
Wow this looks creepy and cute at the same time, I need to make this!
Cute idea. I love all he little details.
How fun! My daughter would definitely love to do this! So cute.
I love this! We have a few of those toy spiders at home. Now I just need the branch… 🙂
This is super cute. I need to head to the dollar store, need to pick up some goodies to decorate our trunk.
Very clever! Love all the materials you used—my kids would love to put this together!
it’s stunning and even more treasured because the whole family was involved making it.
That was indeed the best part! Love that word, “treasured” 🙂
Inexpensive, easy to do and it looks impressive and cute. I love it!
I am doing a last minute party – this may come int o play. Thanks!
I am always last minute when it comes to decorating. This is a great idea. I love the one with the spider webbing.
I’m at my most creative when I work last minute, at least that’s what I tell myself. The webbing was my sons, fitting ;). Glad you liked it.
This is an awesome last minute Halloween Centerpiece. It would be fun to make with the kids too. Thanks for sharing.
This is such a great way to decorate for halloween! But also all year long!! Just add in or change the accent colors! Very coool!
This is fantastic. Love that you could get the items from home and the Dollar Store. The perfect last minute Halloween centerpiece!!!
That a really creative themed center piece. I like that the kids can help building it up.
I can’t believe how easy this was. It looks so involved! Such a fun project.
How creative. I love this idea its easy and simple and looks so good.
Thanks Danielle! :). We enjoyed making it as a family 🙂
I would love to see what you all create! 🙂 Twitter @CGMammaG or Instagram #CGMAMMAG.
This is awesome! I love quick and easy decorating with dollar store stuff for any holiday.
This is such a cute centerpiece! It seems so easy and inexpensive. Great festive fun to show around the house!
What a wonderful venture and a beautiful, creative effort. Love the centerpiece.